


I know there’s a lot of vray render set-up tutorials all over the web, but please give me a try on this one. 🙂 I’m using 3ds Max 7 and Vray 1.5 RC2 and I think this settings will be applicable to all Vray plugins.
First, create a plane like figure 1. It could be like a letter “c” or “L” when you look in side view. Of course I turbosmooth with 1 or 2 iterations as you can see on figure 1.
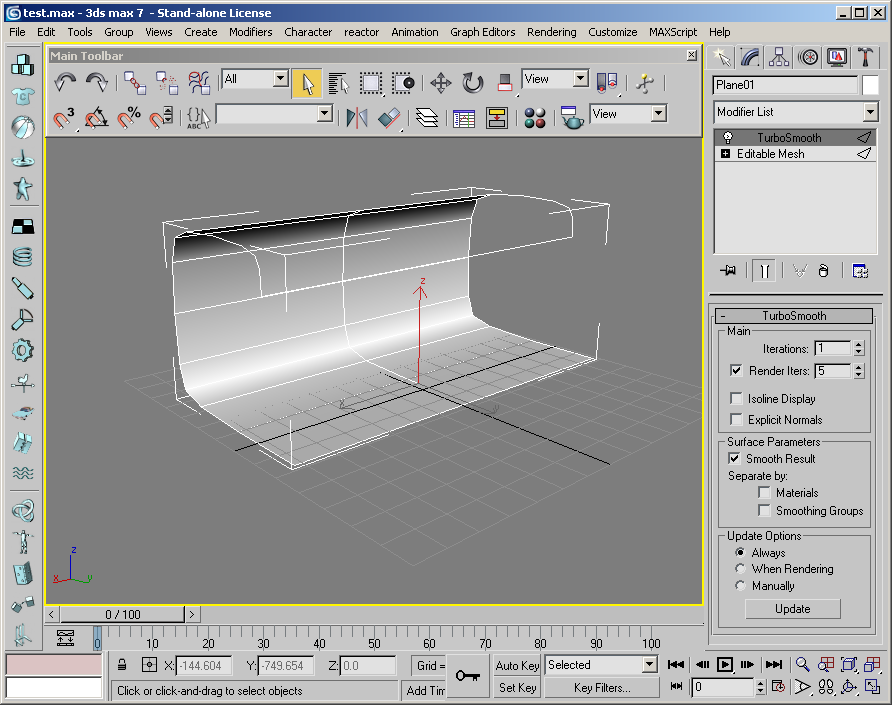
Figure 1
Press “M” on your keyboard and material editor will show up like Figure 2. Click the first material and rename it as “Floor” then change the diffuse to white color. Then click and hold the floor material and drag it to the plane that you created. Then close the material editor.
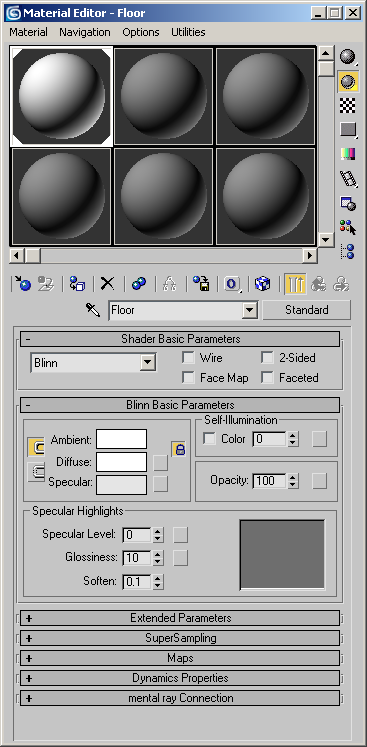
Figure 2
Ok here’s next, create three VRayLight as you can see on Figure 3. Lets call the three VRayLight as Light Left, Light Right and Light Top. I did different settings of the light. Now on the Light Left make the multiplier to 3.0 and set the color to white. On the Light Right make the multiplier to 2.5 and set the color to this RGB (R-164, B-136, G-111). And on the Light Top make the multiplier to 2.o and set the color to white.
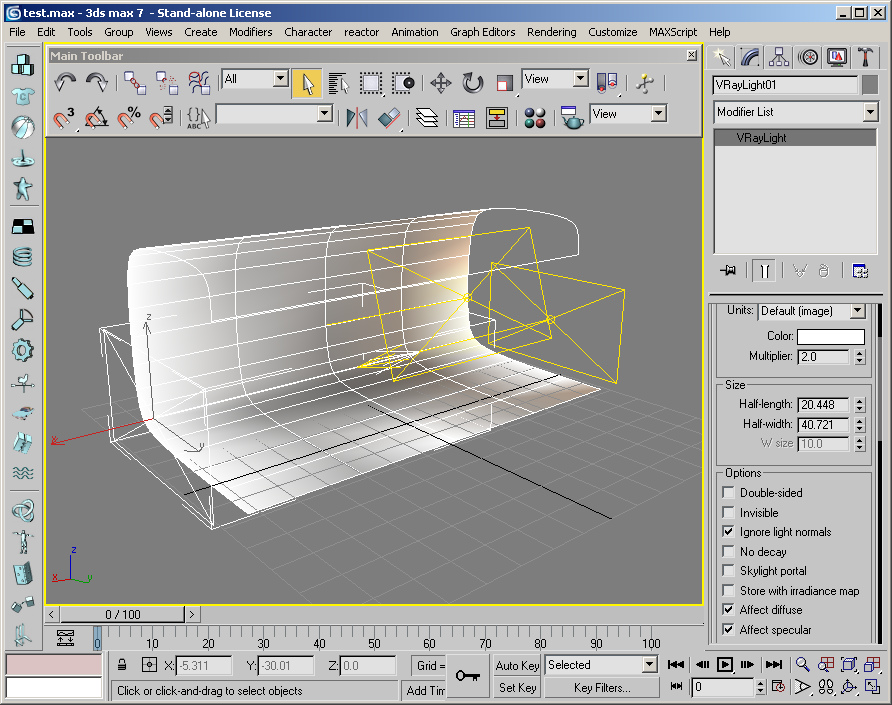
Figure 3
Here’s next, create a VRayPhysicalCamera (that is a target cam). Set the Vray target cam like on Figure 4. Now open the Render Scene and set the production under assign renderer to V-Ray Adv 1.5 RC2 or any Vray will do as far as I know. So as you can see on Figure 4 the render is too dark by the default setting of vray and default settings on vray target cam.
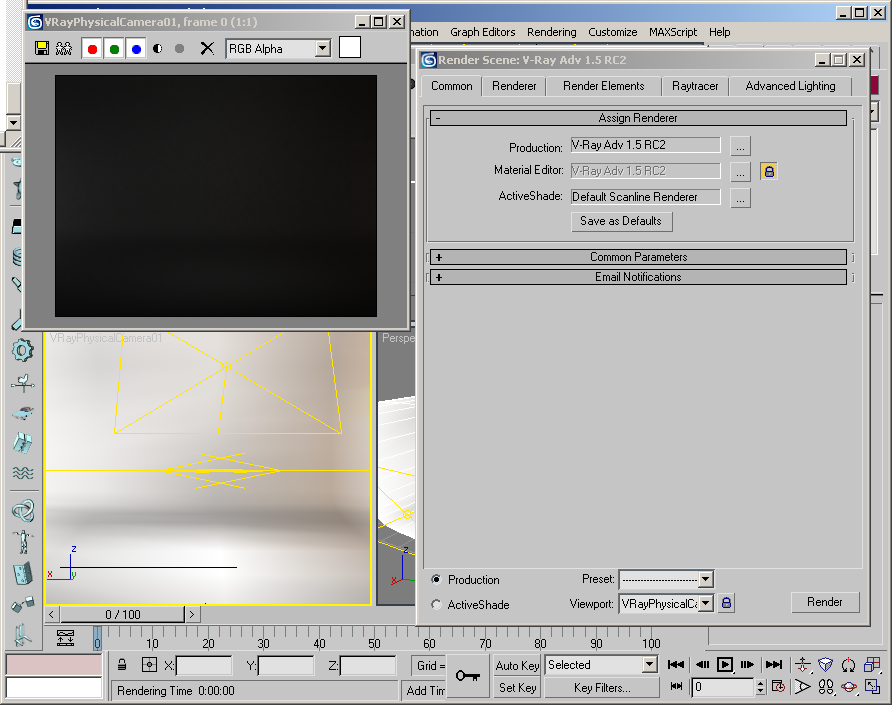
Figure 4
Here’s the simple setting for the camera. Make the f-number to value of 2.0 then shutter speed value is 15.0 and film speed(ISO) is 400. Now I create here a standard primitives teapot then I set my target cam to it like Figure 5.
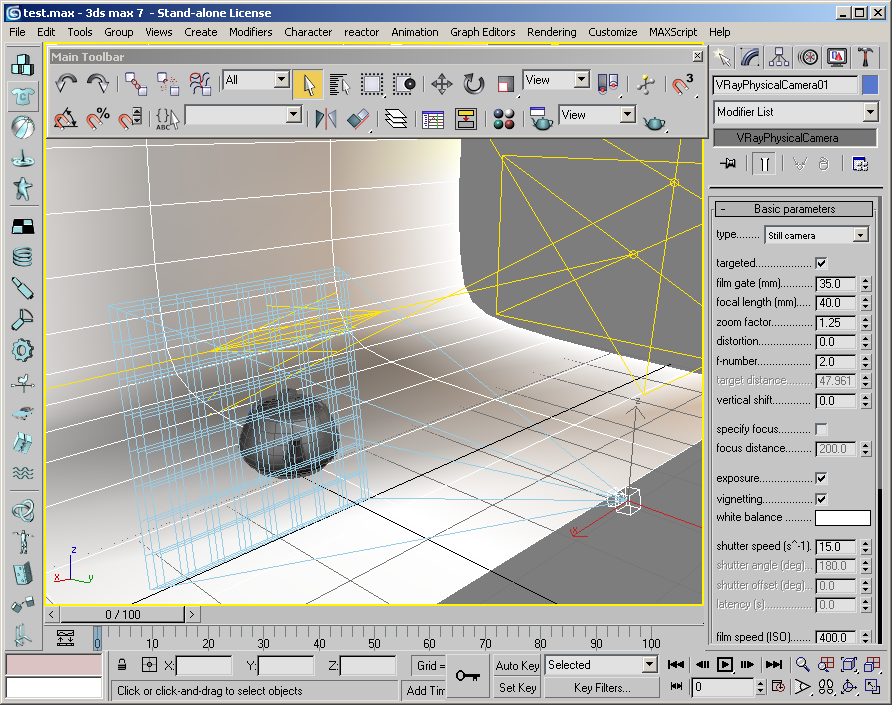
Figure 5
Next step, open the render scene dialog make the settings on Figure 6. I gather this settings to what I’ve learn in Vray so far, but you can always make your own settings.

Figure 6
After you changed the vray settings hit render and you will see building light cache like on Figure 7.

Figure 7
Then here’s Figure 8 for the finished render. Note that teapot is just a super basic material.
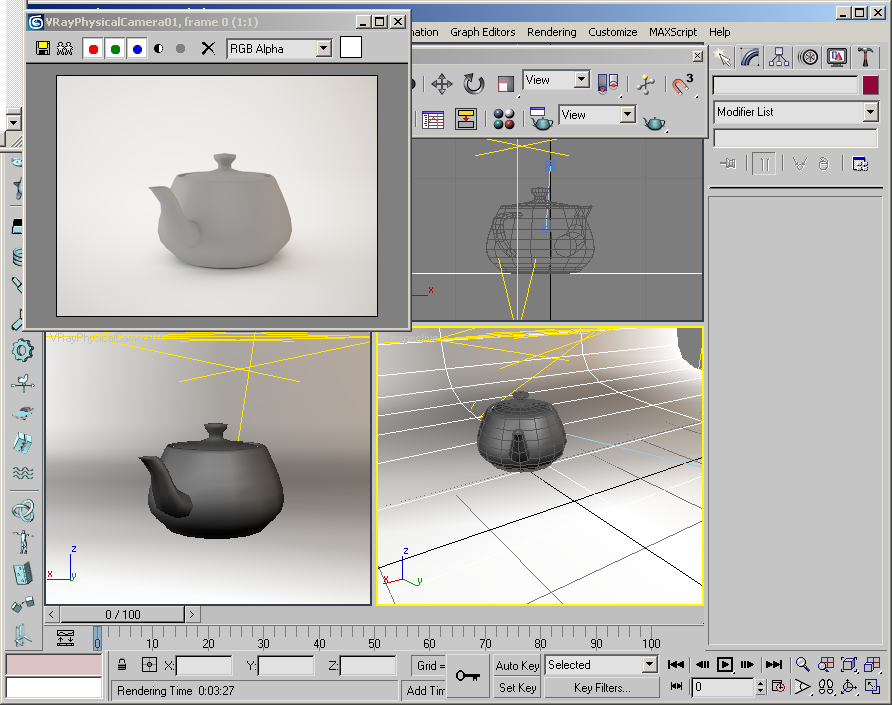
Figure 8
I created a new material chrome and applied to teapot. Teapot is turbosmoothed also. And here’s Figure 9.
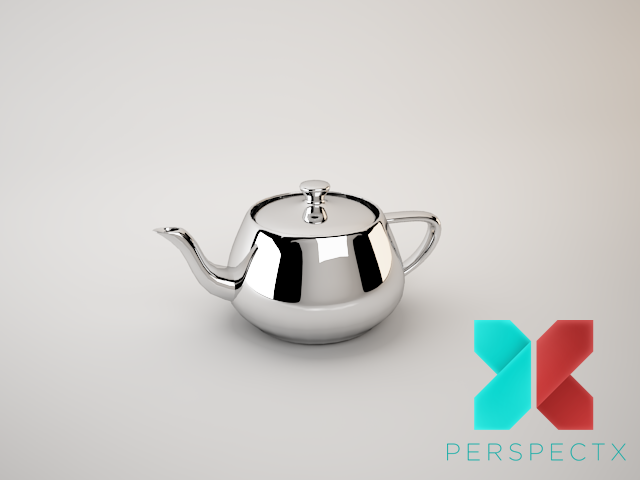
Figure 9
Anyways, go ahead and try vray render scene set up and you can improve what I’ve done on this set-up. Here’s the source file.
And please do check also this link below for Perspectx product with Vray set-up.
and more to come soon….