


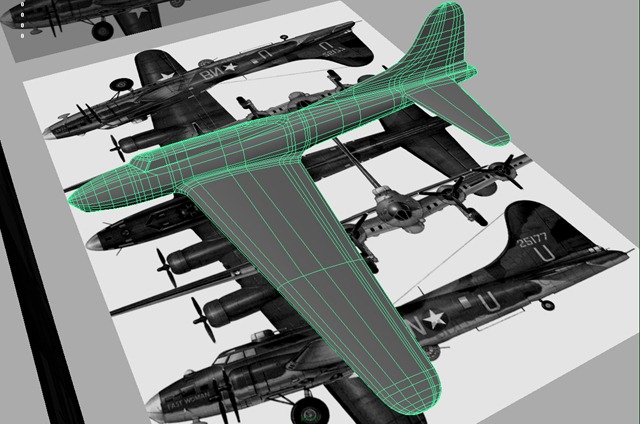
Now that I have image planes put together for the model I can start the building process. Usually with aircraft I start with a cylinder with about 20 faces. From that cylinder I can extrude it out to create a rough fuselage shape for the aircraft. Once that was done I built a wing by creating an airfoil shape with “Create Polygon Tool”. This shape was then extruded out to create the wing. Once I had a basic fuselage and wing shape I merged them together using a Boolean union. I then had to match edges as they transitioned from the fuselage to the wing and merged vertices. This process of getting the wing and fuselage fully merged and looking good took about an hour to do. Here are the final results:
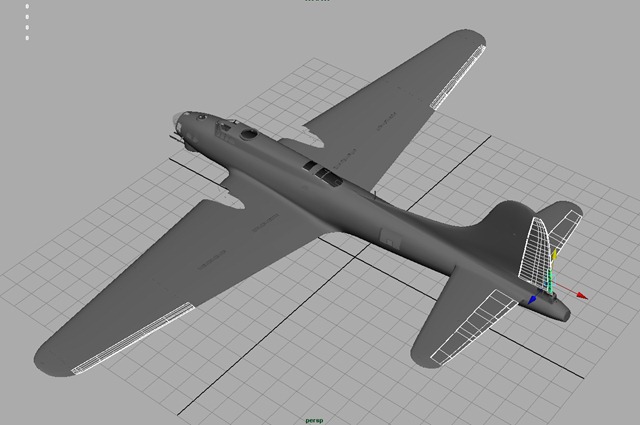
Just to see how my aircraft looked so far I mirrored the half I had been working on and then smoothed. This can be seen in the following image:

I then undid the smoothing and mirroring so that I could work on the next part of this project.
Cutting out the ailerons, rudder, and elevators was next. I then worked on the windows and other features associated with the wing and fuselage. It took me a few days of work to do all of this but once finished I ended up with the following:
This concludes part 3.
 Prev Post
 Next Post
0 Tags: 3D · B-17 · B-17 Flying Fortress · B17 · maya · model · PerspectX · TurboSquid
Comments