


A character rig or “Biped” in 3ds Studio Maxwhich is pre-made and allows the user to adjust the rig to fit the character they will be animating. Dedicated curve editors and motion capture data import tools make Character Studio ideal for character animation. “Biped” objects have other useful features that automated the production of walk cycles and movement paths, as well as secondary motion (from wiki).
This tutorial is for beginner to intermediate user in 3ds Studio Max. Its applicable to 3ds Studio Max 7.0 to 3ds Studio Max 2011.
Now let’s start, I use our Fighter Pilot as a character to be rig which is model by Allan (note: which happen to sell in Perspectx Store and Turbosquid). I’m gonna show you here in Part 1 how to set-up and align biped in a character model.
Open your model in 3ds Studio Max. Then select the entire mesh of your character and hit ALT X in your keyboard to make your model in ghost mode then right-click on your mouse and select Freeze Selection . (The original Fighter Pilot model has a helmet and a vest. I just removed it for easier in weight painting (called in maya) or moving/adjusting the envelope in vertex mode.


Then start creating Biped. Select Create tab, Systems and click Biped. Click and drag your cursor starting the sole of the feet/shoes of the character until you meet your desire scale of your character.
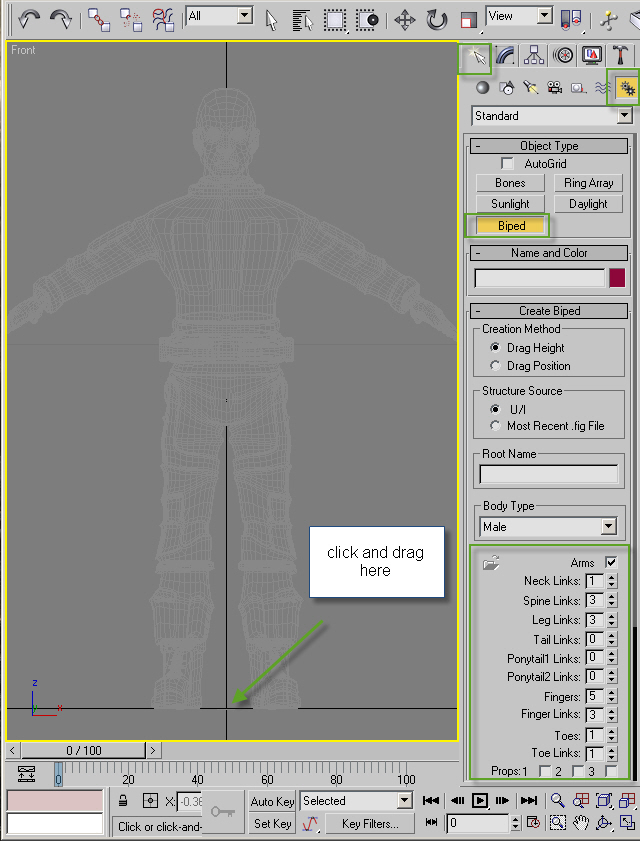
Now my biped not scaled as like as my sample character. Base on the other expert tutorials the root mesh of biped or Bip01 should be in the genital area of the character. This is what I know and learned from other tutorial. I select male as a body type or you can select any of those selection. Then look at the parameters that I inputted. I didn’t add Toes and Toe links because my sample character uses a shoes.
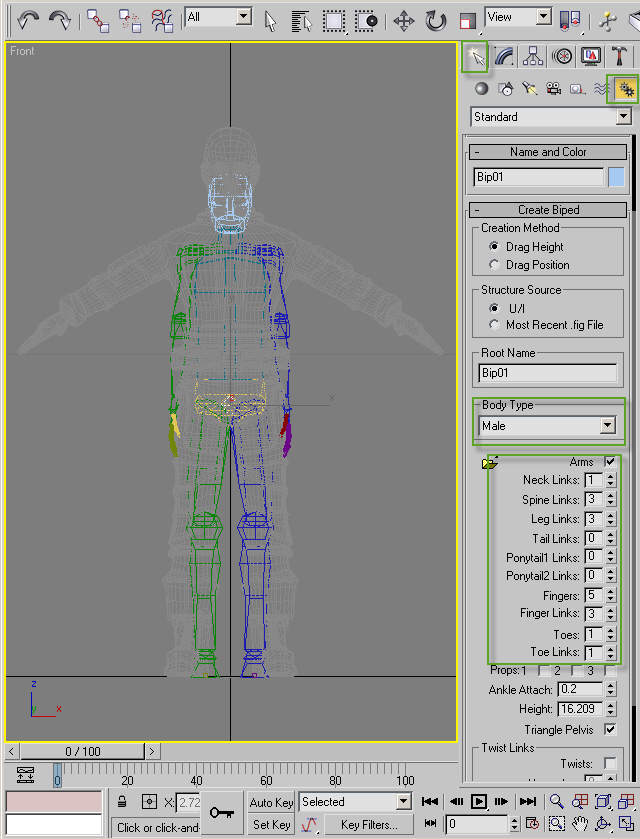
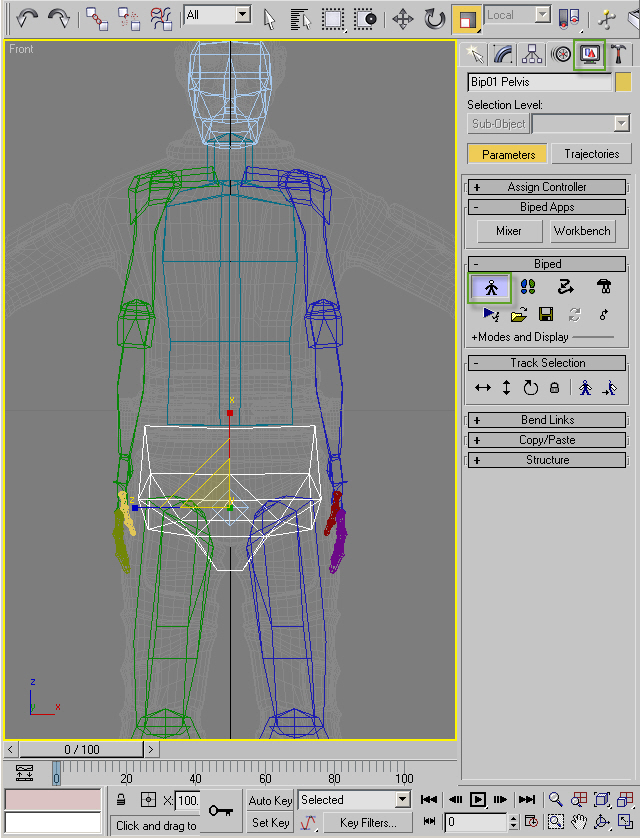
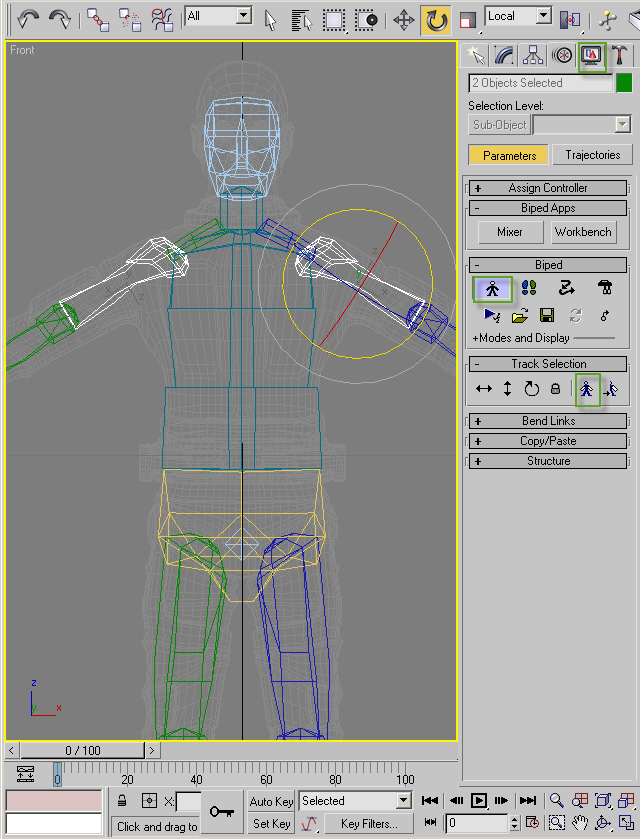
Now we will move, rotate and scale our biped to match our sample Fighter Pilot model. Select any part of the biped mesh or lets start with the pelvis mesh then select Motion Tab and from there you can see biped parameters such as Figure Mode ![]() and etc. Click Figure mode
and etc. Click Figure mode![]() . Hit R on your keyboard to Scale it according to your character model. Any biped mesh can be scaled rotate or some parts can be move according to their parent. (some of biped mesh doesn’t move)
. Hit R on your keyboard to Scale it according to your character model. Any biped mesh can be scaled rotate or some parts can be move according to their parent. (some of biped mesh doesn’t move)
Now moving/rotating/scaled in symmetrical. Selecting any biped mesh UpperArm for example and select Symmetrical![]() under Track Selection. From there you can rotate your biped UpperArm mesh symmetrically. It will work also to other biped mesh with symmetrical action. (Tips: I notice that every time I select other mesh the symmetrical function is disabled. So you must reclick/reactivate your symmetrical
under Track Selection. From there you can rotate your biped UpperArm mesh symmetrically. It will work also to other biped mesh with symmetrical action. (Tips: I notice that every time I select other mesh the symmetrical function is disabled. So you must reclick/reactivate your symmetrical![]() function.
function.
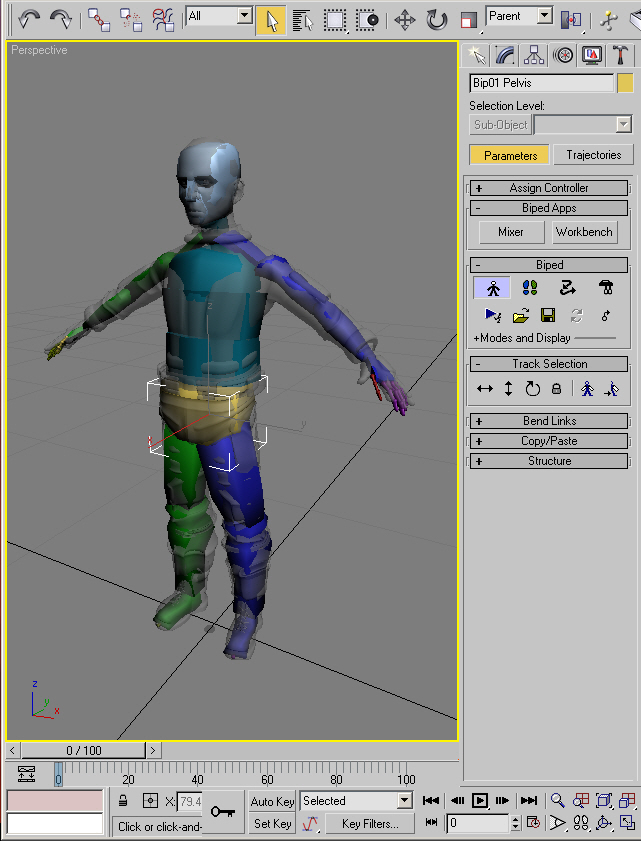
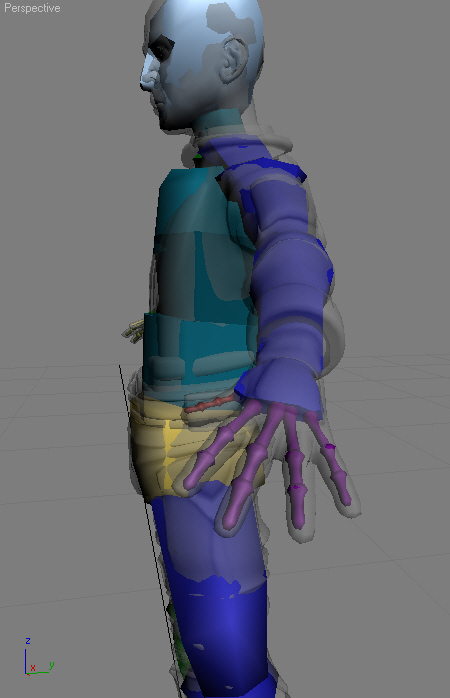
And now here’s my Biped Set-up! It is ok if your biped is a little bit outside of your Character mesh but biped should be aligned properly.

Part 1 is done. See you in “Biped in 3DS Max Part 2: Rigging Biped”