Maya’s luminance depth preset can do a lot of things for the finished look of your animation, with a minimal expense of render time. You can use it to generate post controlled fog or darkness, depth based compositing of elements, or for a good, post controlled focal blur.
Maya’s Z Depth channel rendering has a few problems. It’s not easily read or used by your favorite compositing program, it is not anti-aliased so you may get jaggy side effects by using it, and it’s not necessarily the fastest thing to render. TRIED IT!
Setting up depth of field on your camera in Maya is a bit tricky, it usually involves writing some expressions and setting up a rig with locators or something. Great stuff if you are used to it but you have to re-render to adjust the depth look. DONE IT!
First of all I’ll be demonstrating some of the uses using Maya 8.5, After Effects CS4, and Frischluft’s ‘LensCare’ plugin which is a worthy investment for your compositing arsenal even if you are on a budget.
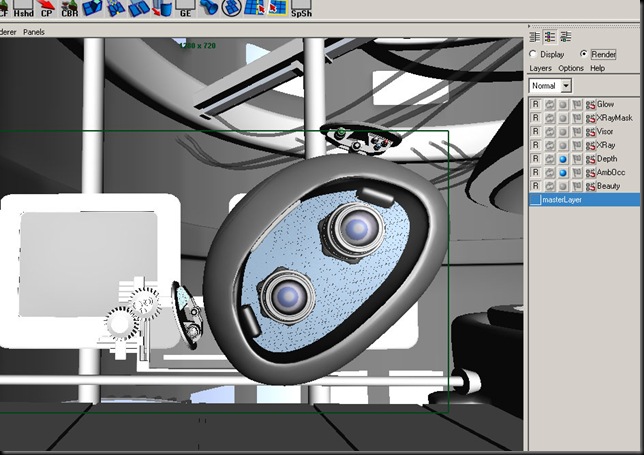
First, in Maya let’s set up a Depth pass. Here you can see a shot where I have done it, but what you want to do is add a render layer, name it ‘Depth’. Right click on it and choose the preset ‘Luminance Depth’. Once you do that you will want to adjust one more thing.
You will want to find the shader override that it created. By default the node gets named setRange1 but you can find and graph the shader if you want. You want to break the max and maybe the min expressions the shader constructed. Why? Because it tries to judge the min and max distance based on the camera view. If you have stuff out of view or way out in the scene including an HDR map, those values will not be optimal.
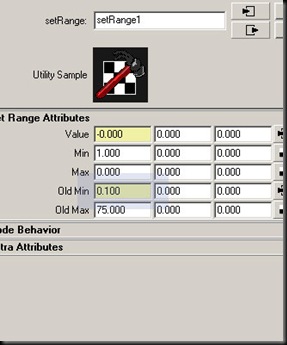 Here in this shot, I found that the Max value it suggested of 300 left the scene too black. Much of the background focal info would be useless. I found that a value of 75 yields the following render for Depth:
Ideally you want the front clipping plane to render as white RGB(1,1,1) while the most distant near black RGB(0,0,0).
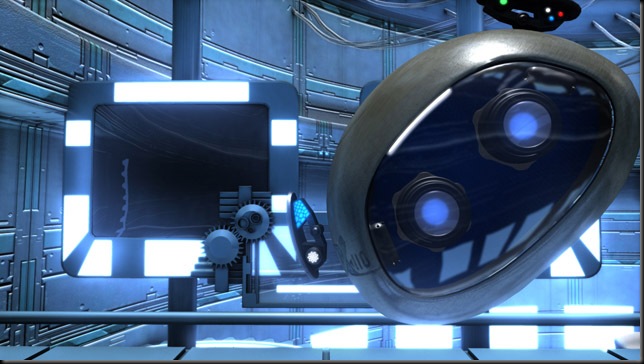
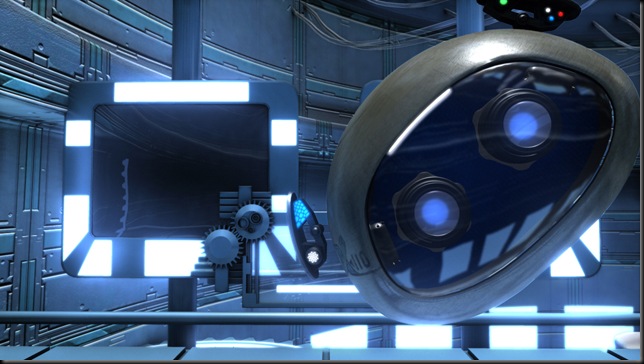
Okay. I’ve compiled the beauty, ambient occlusion, and a glow layer here in AfterEffects and done nothing else. This is ‘before’. The shot was rendered with Mental Ray, using Final Gather and a few incandescent light sources. But no depth of field or really feeling of depth using other means. This is ‘before’.
I want to darken the background behind the subject a little bit. I’m just going to borrow the depth pass and multiply it on the original at 35% opacity. Or maybe you will want to do something like use this for a mask on a solid color to add a post adjustable fog.
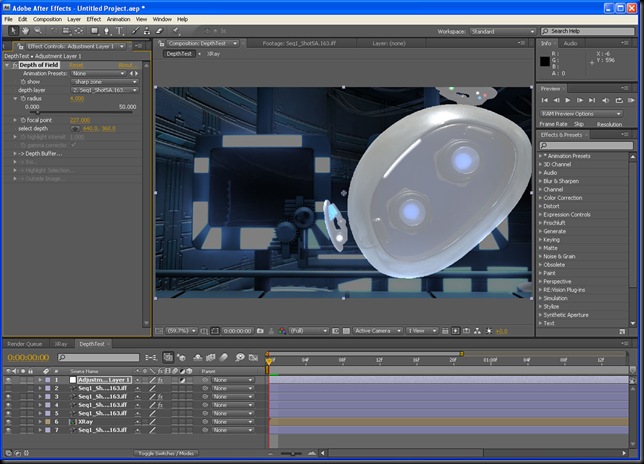
Quickly now let’s finally use it for what we most intended, as Depth of Field. Add your depth image to the top of your composite and hide it’s visibility. Create an Adjustment Layer, add the Frischluft Depth of Field effect. Everything will go blurry. Next, assign your hidden layer from the first of this paragraph. It will look better but not quite there. The properties you are interested in here is radius (lower values are similar to higher F-Stops, while higher values are like lower. I find 2.0-4.0 are good values). Now how you ‘pull focus’ is by using or even animating the focal point property. To do this well I like to show the ‘sharp’ zone pictured below, which will show the infocus region as a white overlay while out of focus regions will have a darker mask applied.
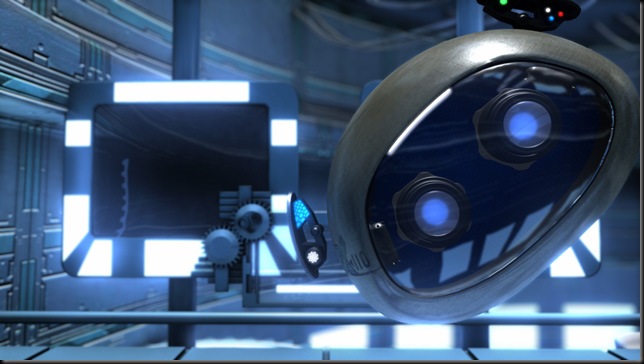
Finally shown is the same shot using Frischluft and Maya’s Luminance Depth preset. The Depth preset is being added both as a multiply layer to darken the background a bit above, and finally being used on my topmost adjustment layer with the Frischluft effect.
The depth preset layer renders in just seconds even at HD resolution since it is scanlined and has a fast shader applied. It’s anti-aliased and can be used for a variety of effects. One technical note, you can duplicate the special shader created by Maya, and either map transparency or adjust it for situations like alpha textures or glass. Often I will just omit glass surfaces altogether from the depth layer so that for instance, window contents in the distance don’t errantly appear sharp.
Any questions comments or pointers appreciated!



 Prev Post
 Next Post
Not sure if you know much about maya 2009 but is the “Luminance Depth” preset just a render pass now?
Swish, not sure to be honest with you. The older Mayas had a depth output option/pass but it was quite low quality (no anti-aliasing). If you find out please post and let us know! I do know however that setting it up as a render layer still works in Maya 2009 as some of our clients use newer versions of Maya.
As of 2010 you can still use the Render Layer by right-clicking the render layer, select attributes and then select it as a preset. I prefer this route to the render pass route personally.